

When attached to a Cloud Router, your AWS Hosted Direct Connect can be share a routing domain with other cloud links and virtual circuits.Documentation Index
Fetch the complete documentation index at: https://docs.zayo.com/llms.txt
Use this file to discover all available pages before exploring further.
Prerequisites
Before you begin, ensure you have:- An active AWS account with permissions to accept Direct Connect connections
- A DynamicLink port with available bandwidth
- Your AWS account ID (12‑digit number)
Step 1: Create the Cloud Router connection in DynamicLink
Navigate to Build Your Network > Ports in the DynamicLink portal. Under Connections, click the Cloud Router vertical tab. Select Cloud Connection and then AWS: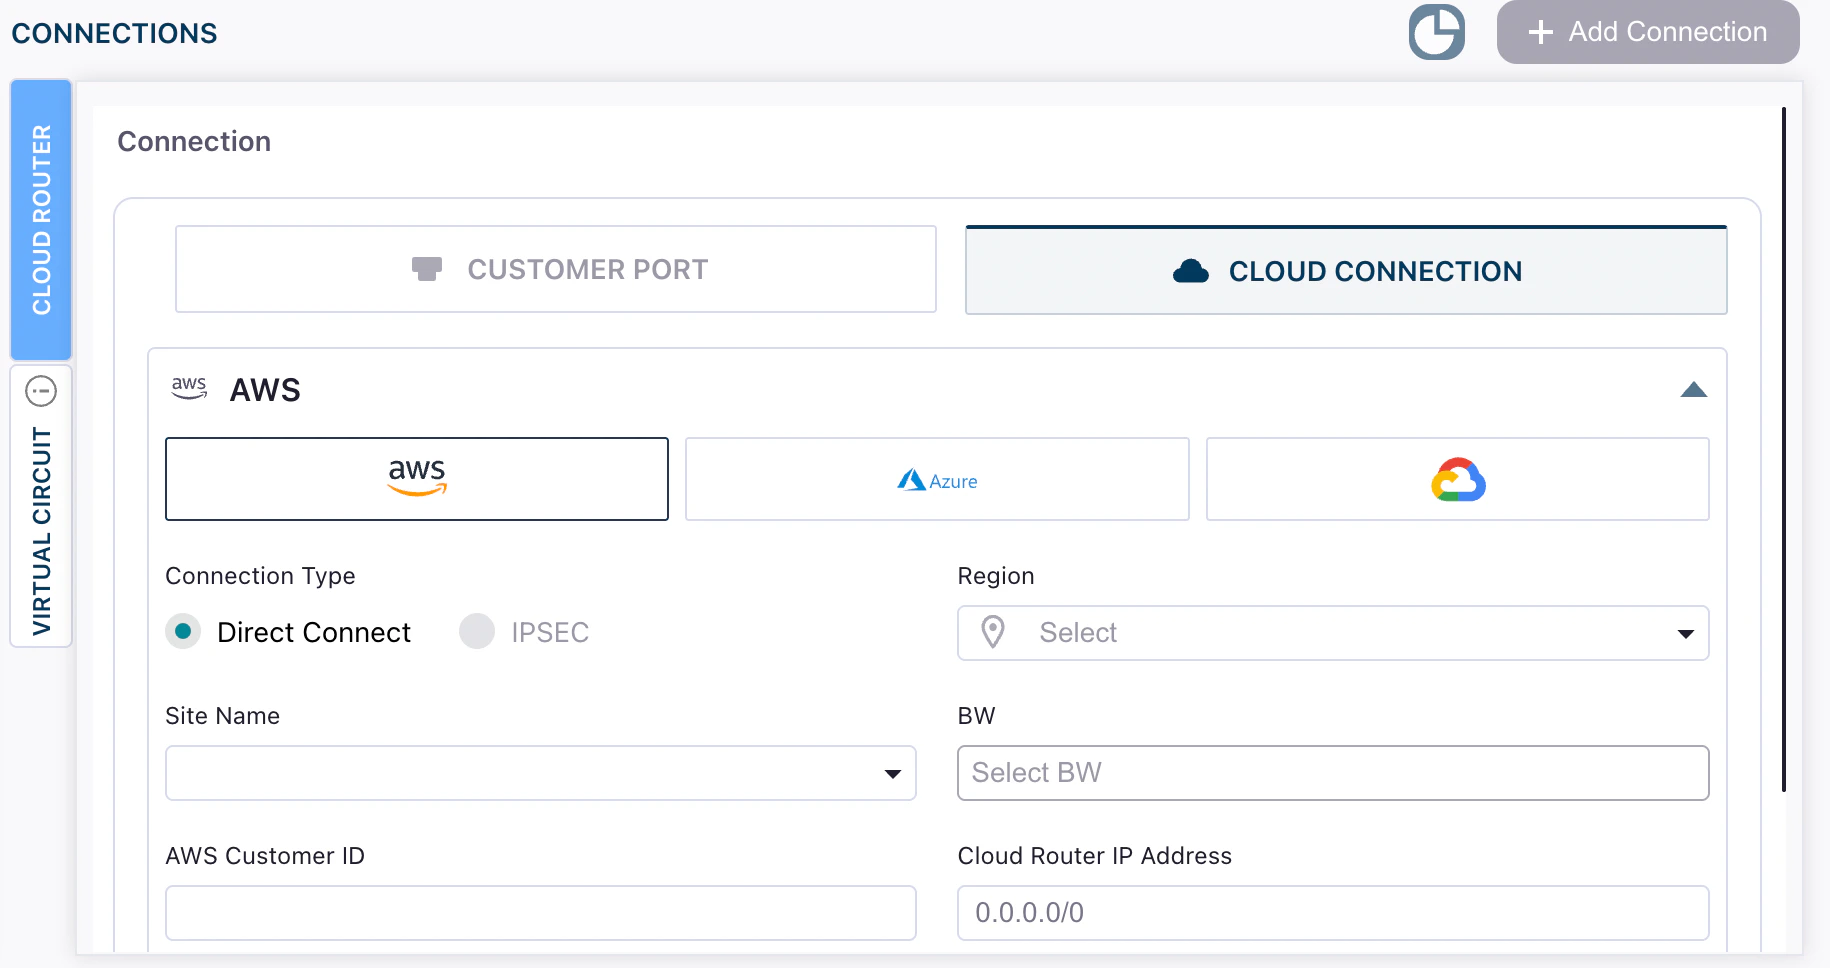
| Field | Description |
|---|---|
| Connection Type | At this time, we only support Direct Connect connections. |
| Region | AWS region of your VPC (e.g., us-east-1). |
| Site Name | An available site for the chosen region. |
| BW | Desired bandwidth for the Direct Connect link. |
| AWS Customer ID | Your AWS account ID (12 digits). |
| Cloud Router IP Address | The IP address that the Cloud Router will use for BGP peering with AWS. This is typically the customer-side IP address in a /30 subnet. When creating your Virtual Interface in AWS, you’ll specify both the AWS-side and customer-side IP addresses for the BGP session. |
Step 2: Accept the connection in AWS
- Log in to the AWS Management Console and open AWS Direct Connect.
- Locate the new connection (it will reference your DynamicLink account/username).
- Select the connection and click Accept.
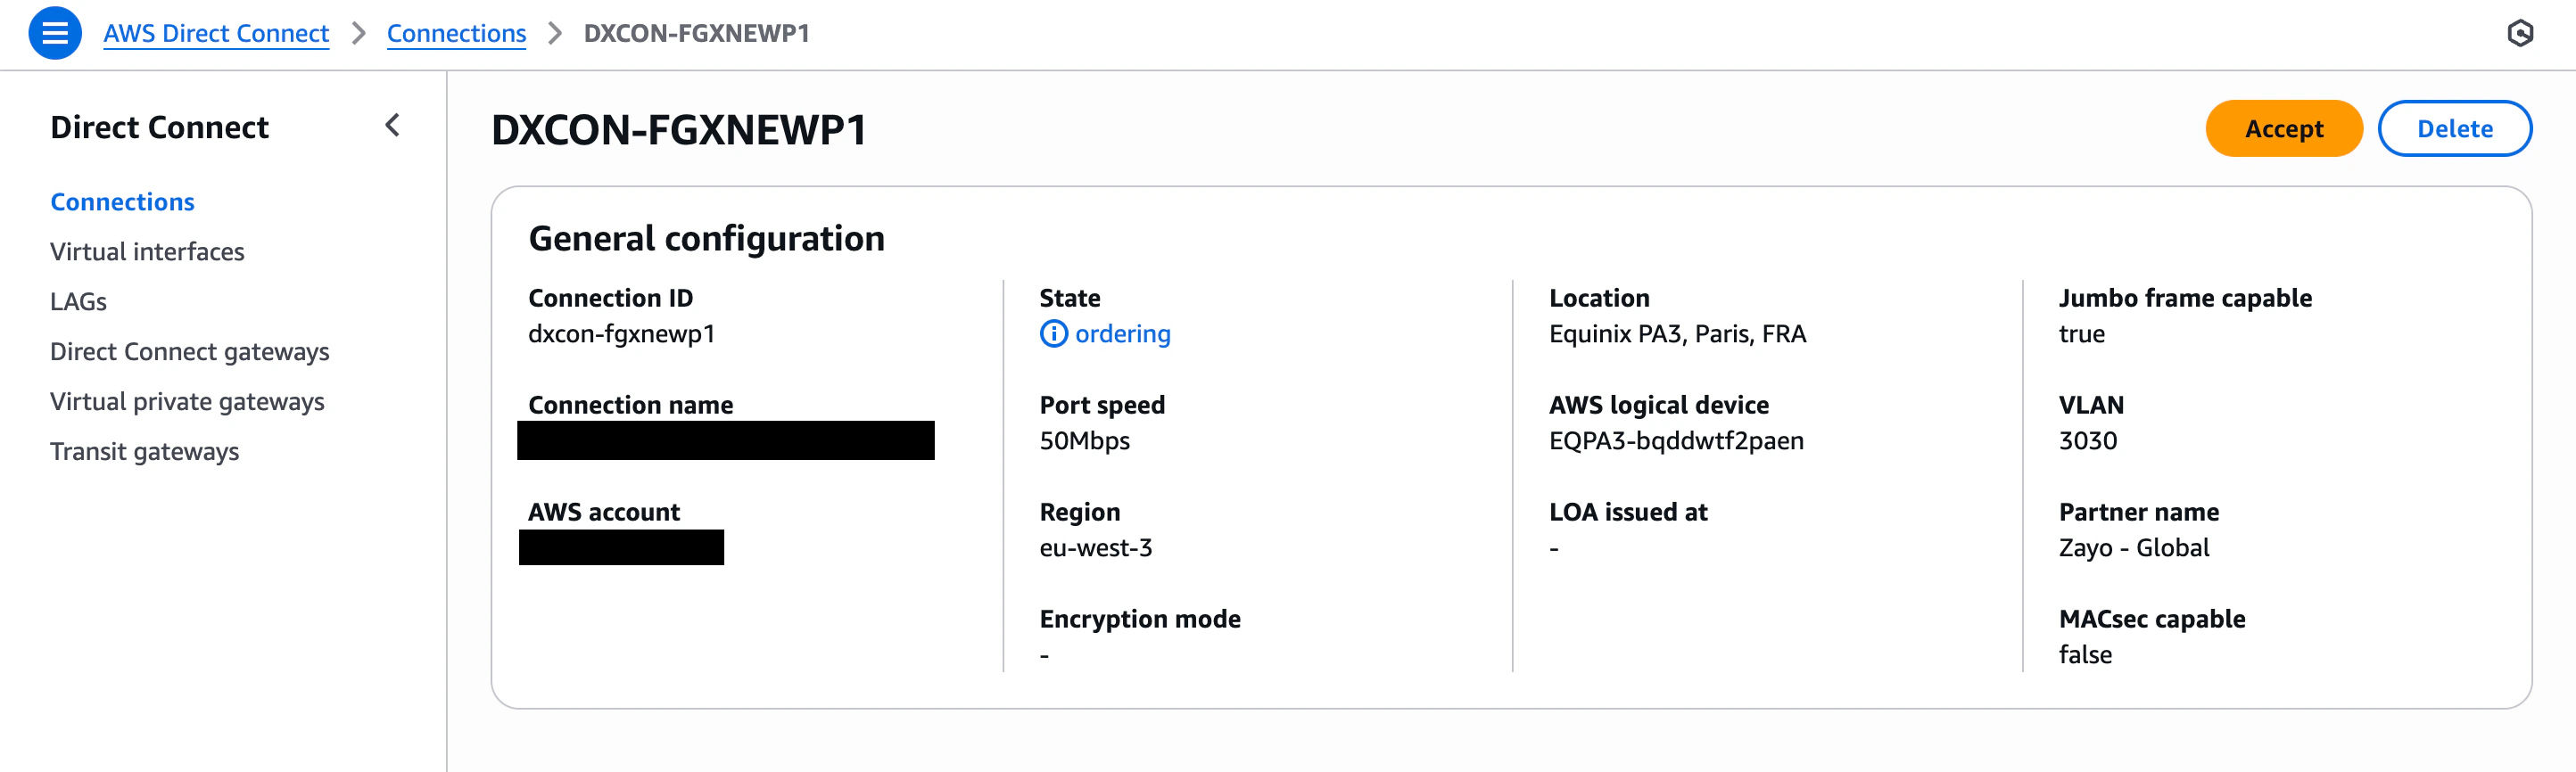
Step 3: Create AWS virtual interfaces (VIFs)
After the physical connection is available, create one or more VIFs to carry traffic:- Private VIF for VPC connectivity
- Public VIF for AWS public services
- Transit VIF for AWS Transit Gateway (TGW)